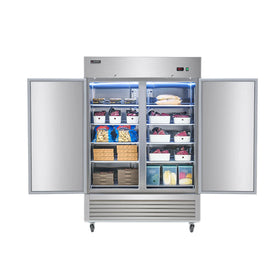
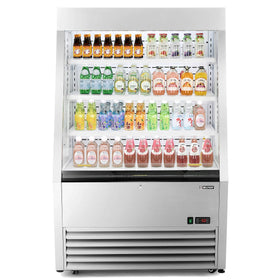
A commercial refrigerator is a game-changer business in the food industry. In restaurants and commercial kitchens especially, commercial refrigerators are a means of keeping a large variety of meat, dairy, fruits, vegetables, and ingredients fresh and healthy for their menus, helping them reduce costs and maximize efficiency. For this reason, every business in the food industry must understand and master some key secrets and steps on how to maintain a commercial refrigerator in order to keep it working at full capacity. Perhaps the most important secret in keeping the refrigerator performing at top-from is knowing how to defrost. This blog will succinctly discuss defrosting, explaining why it is necessary, and laying out a simple 10 step process on how to easily and efficiently defrost a commercial refrigerator. Read on to learn a procedure that will keep your refrigerator in top form for a long time.
PART ONE: WHAT IS DEFROSTING?
Without going into the overly complicated and technical details of how a refrigerator works, it suffices to know that frosting happens when the air in the refrigerator is cooled, condensing into the water, which is then frozen and turned into ice-like crystals known as frost. Over time, the frost begins to accumulate and buildup. If not taken care of, frost can become cumbersome, taking up much-needed space in the refrigerator and hindering the overall effectiveness of the machine. Defrosting, therefore, refers to the process of melting or removing accumulated frost or ice buildup from the interior of the refrigerator.
COMMON CAUSES OF FROSTING
As a rule, frosting occurs whenever warm and humid air is allowed to come in contact with the cold air in the refrigerator, resulting in the warm air getting rapidly cooled down. The following practices should be limited or completely avoided as they will result in rapid frost buildup in your refrigerator:
i. Using Poor Door Seals: Refrigerator doors should be properly fitted and tight. Worn refrigerator doors or improperly fitted gaskets and seals allow warm air to enter the fridge, causing frost to accumulate.
ii. Frequent Opening of the Refrigerator Door: Every time the refrigerator door is opened, warm air is guaranteed to seep in. Leaving the door open for a long time or opening it too frequently will speed up the frosting process.
iii. Overloading the Freezer: Another major cause of frosting, especially in commercial settings, is overload. Overloading is bound to limit air circulation, creating small pockets of warm air, and resulting in irregular and random frost accumulation.
iv. Setting the Temperature Too Low: Setting the temperature too low can cause frost to accumulate faster, especially around the walls and coils. It is recommended to keep refrigerator temperatures between 00-180C to minimize frosting.
PART TWO: DEFROSTING THE FREEZER
Frosting clogs the refrigerator and greatly hinders its ability to keep food items fresh and healthy. Luckily, with some key equipment and tactical strategies, defrosting can be a relatively easy procedure to complete easily and effectively. Follow the steps below to rid your commercial refrigerator of all frost and accumulated ice.
STEP ONE: ASSEMBLE YOUR MATERIALS
For time saving and efficiency, it is advisable to first put together all the items that would be needed for the defrosting process. Make sure you have the following items within an arm’s reach:
- Plastic scraper or spatula: Use this to remove chunks of ice that may be stuck on the refrigerator's walls or shelves.
- Baking soda and water: Baking soda is an effective cleaning solution. Mixed in water, baking soda can act as a refrigerator cleaning detergent to restore the sparkle to your refrigerator.
- Coolers or other freezers: These are used to store the food and food items you will take out of the fridge before beginning the cleaning process.
- Towels and absorbent materials: These will catch the melted ice and water and prevent a mess.
- Clean towels and sponges: To wipe down the refrigerator and keep it dry at the end of the cleaning process.
6. Fan(optional): To blow warm air into the refrigerator, forcing the ice to melt faster.
STEP TWO: CLEANING
i.Unplug the refrigerator: The first step to cleaning a refrigerator or any electrical equipment is to turn it off and unplug it from its power source. Turning off ensures that the refrigerator does not keep running while you clean
ii. Empty the Refrigerator: Carefully remove any remaining food items from the refrigerator. Remember to place the items in the coolers to keep them frozen.
iii. Leave the Door Open: Leaving the door open is a simple way to allow the frost and ice to melt, thus hastening the process of defrosting. Another trick to accelerating the melting of the ice is to place the fan in front of the refrigerator and blow warm air into it.
iv.Remove the Excess Ice: As the ice melts, use the plastic scraper or spatula to gently scrape along the refrigerator's walls and shelves to remove any chunks of ice that may be stuck. Take care not to damage the interior by scrubbing too hard, and do not use metal equipment to scrub.
v. Clean the Interior: When the ice is melted, proceed to clean the interior of the refrigerator with the baking soda and water solution. Pay specific attention to the corners and tips where ice and water may have accumulated. The process of cleaning the interior is not complete until you rinse the whole interior with clean water. After rinsing, your refrigerator should look as good as new.
vi. Wipe away the Water: Placing the items back into a wet refrigerator would be a serious mistake, as it would only relaunch the frosting process once it is turned on. Using clean cloths, wipe through the interior, drying completely before plugging the refrigerator back in.
vii. Dispose of the Melted Water and Ice: Remove the mats and rugs from the floor around the refrigerator till the surrounding environment is clean and dry.
viii. Reconnect and Start: Now, you can restart the refrigerator. Make sure it reaches the desired temperature before putting your items back in.
Congratulations! In eight quick steps, you have successfully rid your refrigerator of not only frost and ice but also dirt and dust. A newly defrosted refrigerator is almost as good as a new one, greatly facilitating business operations and helping serve customers.
As your business expands, you might find a need for a new commercial refrigerator. This is where Willprep comes in. Willprep is a trusted supplier of high quality commercial equipment for all businesses within the food industry. From Reach-in refrigerators to Worktop Refrigerators and Freezers, Wilprep provides a multitude of refrigerators to meet a variety of business needs. Customers have been particularly impressed by Wilprep’s Merchandiser Refrigerator, which has two sliding doors. Check out Wilpreps collection to find out what the buzz is all about.


