What are Icebox cookies?
Icebox cookies, also known as refrigerator cookies, are a type of biscuits that are sliced and baked, made from dough that is refrigerated before baking. The traditional method is to roll the dough into a cylindrical shape with plastic wrap, refrigerate it to harden it, and then cut it into round shapes for baking. It can also be shaped into other shapes according to molds to obtain biscuits of different shapes; this method allows bakers to prepare large quantities of dough in advance and enjoy freshly baked biscuits as needed.
A brief history of ice cube cookies
The term "icebox cookies" originated in the early 20th century, when most American households used iceboxes (pre-refrigerated compartments in the refrigerator) to keep food fresh. These biscuits became popular at the time, especially during the Great Depression, because they were simple to make, easy to store, and could be made in small batches, and many families still make these traditional biscuits today. They became a staple in American kitchens and are referred to as "old fashioned refrigerator cookies" in many vintage cookbooks.
Why do people still love them today?
Even in today's fast-paced world, iced cookies are still popular because of their following characteristics:
● Convenient - prepare in advance, cut as needed, no leftovers
● Multifunctional - you can add different ingredients according to your taste to enrich the taste
● Perfect for busy schedules - no need to cook everything at once
● Neat and tidy - the dough can be frozen or kept in the fridge for several weeks
This classic treat combines tradition with modern convenience, making it a great recipe for any home baker, and the simple ingredients and steps make it easy for baking beginners to master.

How do they taste?
Traditional icebox cookies are soft, slightly crispy, buttery and slightly sweet. Some are soft and delicious, while others are crispy and crumbly. These biscuits are suitable for everyone to enjoy without being too greasy. And the different ingredients used can make the flavors range from rich chocolate to refreshing lemon. Small changes can make people feel different.
Why does the dough need to be refrigerated?
Refrigerated dough is easy to cut cleanly after being frozen and keeps its perfect shape in the oven. Moreover, the speed of use is completely under your control. If you prepare the dough in time in advance, it will not easily go bad in a low temperature environment. You can bake a few cookies at a time and save the rest for later. Baking in batches means shorter baking time and less heat in the kitchen, so it can be easily completed even in summer.
Refrigeration doesn’t just preserve it: it improves flavor and texture, too!
Compared to freshly baked cookies or dough, cooled cookies have a more distinct and delicate flavor and a drier, lighter, and crispier texture, making them an ideal snack for warm weather.
As the temperature drops, the butter in the dough solidifies. During baking, cold butter melts slower than room temperature butter, so the dough does not spread out quickly in the oven, and the cookie structure is more stable than other types of biscuits. The sugar in the dough is fully integrated with other ingredients during the refrigeration process, and caramel is easily produced during the baking process. The integrated taste brings a rich flavor. After cooling, the moisture content of the dough will also decrease, and the biscuits are baked until the edges are crispy, the surface is firm and crispy, and the taste is drier.
How to Make Old-Fashioned Icebox Cookies (Detailed Steps for Beginners)
If you're new to baking, or just want to give old-school icebox cookies a try, this recipe with step-by-step instructions will show you everything you need to know to make classic icebox cookies at home. This recipe makes about 12 to 16 cookies, perfect for serving 1 to 2 people.
A small amount of basic recipes
raw material:
● 1/2 cup (113 grams) softened unsalted butter
● 1/3 cup (65 grams) granulated sugar (or light brown sugar for a sweeter taste)
● 1 egg yolk (from a large egg)
● 1/2 teaspoon vanilla extract
● 3/4 cup + 2 tablespoons (100 grams) all-purpose flour
● 1/8 teaspoon baking powder
● A pinch of salt
Step-by-step instructions
1. Beat the butter and sugar until fluffy
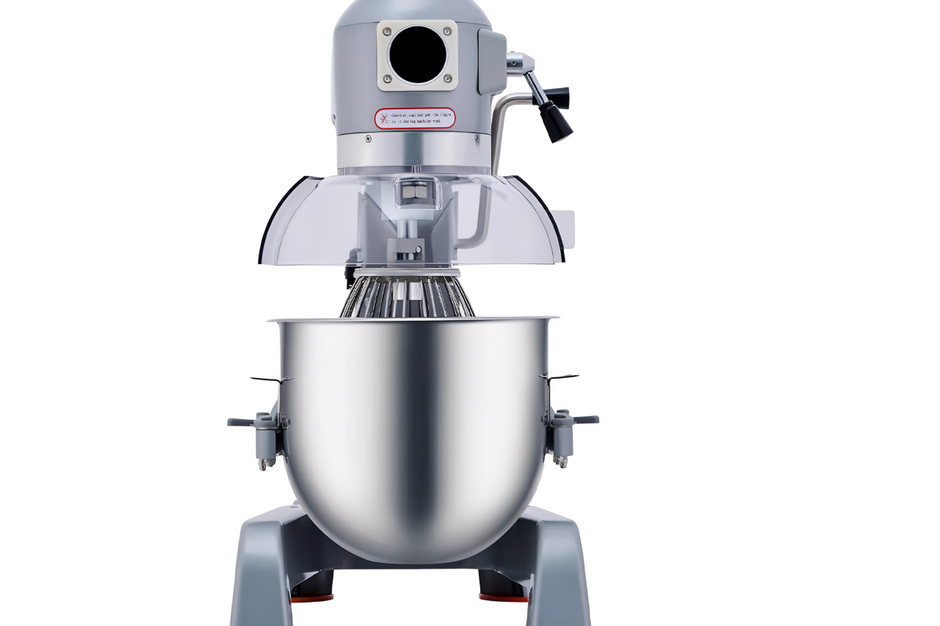
You can melt the butter at room temperature in advance. Press it and you will see fingerprints, but it will not liquefy. After the butter is softened, put it in a medium bowl with the sugar. Use an electric mixer or a stand mixer to beat at medium speed for 2 to 3 minutes until light and fluffy. The color of the whipped butter becomes lighter, close to cream color, and the texture of the mixture is finer, with no obvious particles. You can use your finger or a spatula to draw a line on the surface. If the line is obvious and does not close easily, it means that the texture is fluffy. This step is crucial to creating a crispy cookie texture.
2. Add the egg yolks and vanilla extract
Once the butter and sugar are well combined, add the egg yolks and vanilla extract. Continue beating for 30 to 45 seconds until the mixture is smooth. Avoid over-beating - just combine; over-beating will deflate the mixture and make it less fluffy.
3. Add dry ingredients
In another bowl, combine flour, baking powder, and salt. Gradually fold dry ingredients into wet ingredients. Stir with a spatula or whisk on low speed. The dough will be soft but easy to work with. If it's too sticky, refrigerate for 10 to 15 minutes before shaping.
4. Shape the dough
The traditional shape is a cylinder. Place the dough on a piece of baking paper or plastic wrap. Using clean hands or a spatula, shape the mixture into a cylinder with a diameter of about 4 cm and a length of about 15 to 18 cm. Wrap the dough with baking paper and roll up the ends tightly like candy wrappers to secure. Gently roll the dough to make the edges flat. There are also many baking molds now. You can put baking paper or plastic wrap in a square mold to prevent the dough from sticking to the mold, or you can directly arrange it into a square shape, so that you will get a square cookie. Other shapes are also waiting for you to try.
5. Refrigerate the dough
Refrigerate the wrapped dough for at least 2 to 3 hours, or overnight for a more intense flavor. You can also freeze it for up to a month; thaw slightly before slicing.
6. Cut into pieces and bake
Preheat the oven to 175°C. Line a baking sheet with baking paper.
Use a sharp knife to cut into 6 mm pieces. Arrange the biscuits on the baking sheet, leaving 2.5 cm between each piece. Bake for 8-12 minutes, depending on your oven and the thickness of the biscuits. The edges should be slightly browned. Cool on the baking sheet for 2 minutes before transferring to a wire rack.

Tips for Successful Snacking in the Fridge
● Use room temperature melted butter, and don't over-melt it, as liquefied butter will affect the state of the dough.
● When shaped into a traditional cylinder, the dough may flatten on one side as it cools, and can be turned every 30 to 60 minutes to make it more round.
● If you want to store it, please label the flavor and date on the packaged dough, as it will become unhealthy if left for too long.
● For cleaner cuts, dip your knife in warm water and wipe it dry between cuts.
● Don't overbake them! They will be soft right out of the oven, but will firm up as they cool.
● To freeze: First cut into slices, place parchment paper between each slice, then freeze in a ziplock bag; you can also trim into cute shapes or arrange them into festive shapes at this time.
Flavor variations: 7 delicious icebox cookie ideas
Customize your basic dough to suit your taste and occasion. With precise dosage and a small amount (100 g of basic flour), you can transform a simple dough into your favorite version.
1. Coconut Icebox Cookies
A refreshing taste perfect for summer with a tropical feel.
Add to basic dough:
● 2 tablespoons unsweetened shredded coconut for a richer cookie texture
● Optional: 1/4 teaspoon almond extract for a tropical feel
2. Chocolate Icebox Cookies
Blissful chocolate flavor that brings warmth.

Adjustment:
● Use 2 tablespoons of unsweetened cocoa powder instead of 2 tablespoons of flour
● Add 1 to 2 tablespoons of chocolate chips or grated dark chocolate
3. Christmas Cookies
It is festive and colorful and is very popular with children.

Add to basic dough:
● 1 tablespoon red and green sugar granules
● 1/4 teaspoon cinnamon or nutmeg
● Optional: small pieces of dried fruit (such as chopped candied orange or cranberries) , or chocolate and sugar sprinkles around the edges of the cookies
4. Lemon Walnut Cookies
It has a light citrus flavor and the taste is more refreshing. Friends who like fruits should not miss it .
Add to basic dough:
● 1/2 teaspoon lemon zest
● 2 tablespoons chopped walnuts
● Optional: a drop of lemon extract
5. Orange Pecan Icebox Cookies
A Southern classic with a hint of sunshine.
Add to basic dough:
● 1/2 teaspoon orange zest
● 2 tablespoons chopped pecans
● Optional: a pinch of ground cloves or allspice
6. Peanut Cookies
A nostalgic taste, sweet and salty, if you have allergies, it is not recommended for you to use this method.
Add to basic dough:
● 1 tablespoon creamy peanut butter (reduce the amount of butter to 105 grams)
● 1 to 2 tablespoons crushed roasted peanuts
7. Baked almond cookies
Nutty, buttery, and elegant.
Add to basic dough:
● 2 tablespoons toasted almond slices
● Optional: 1/4 teaspoon almond extract, for extra flavor
Create your own flavor
Feel free to experiment. Here are some other popular DIY recipes:
● Chocolate chips or chopped dark chocolate (1 to 2 tablespoons)
● Granulated sugar (1 tablespoon)
● Dried fruit, such as raisins, cranberries, or chopped apricots (1 to 2 tablespoons)
● Warming spices, such as cinnamon, cardamom, or allspice (1/4 teaspoon)
● Grated zest (1/2 teaspoon, for shine)
● Coat the cookies with icing sugar and shape them in different ways
Limit the total amount you add to about 2 to 3 tablespoons per 100 grams of flour to ensure the dough holds together well.
Creative pairings: not just a cookie, but a meal or a moment
1. Refrigerated Biscuits + Overnight Oats = Upgraded Breakfast
If you have baked a lot of cookies but don't know what to do with them, you can crush them up and mix them with oatmeal and yogurt! In this way, you can have a rich taste of overnight oats and try a new breakfast. These cookies add a crisp, sweet and fun touch to the originally soft oatmeal.
Service Description:
- Crumble the cookies and sprinkle over overnight oatmeal before serving.
-
Select flavor combination:
- Lemon Walnut Cookies + Blueberry Overnight Oats
- Peanut Butter Cookies + Banana Oatmeal
- Chocolate Chip Cookies + Mocha Chia Oatmeal
Not only is this combination delicious, it also provides energy and fiber, and a little surprise that makes overnight oats less monotonous and a great start to the day.
2. Frozen yogurt + refrigerated cookies = a summer afternoon treat
On hot summer days, frozen yogurt and iced cookies are perfect afternoon tea choices. Their crispy texture goes perfectly with melted yogurt, and their small size makes them easy to enjoy.
You can also try new flavors by:
- yogurt layer with cookie crumbs in a glass
- Use the cracker as a spoon or place the yogurt between two crackers
-
Try the following combinations:
- Coconut Cookies + Mango Yogurt
- Chocolate Cookies + Strawberry Yogurt
- Toasted almond cookies + vanilla yogurt
You can also make the cookies and yogurt parfaits ahead of time and refrigerate them in individual cups - perfect for summer parties or to enjoy on their own.
When and Where to Enjoy Icebox Cookies
These cookies aren't just delicious to enjoy at home. Their crispy texture and firm structure prevent them from melting or getting messy, making them perfect for picnics and camping, and they keep well in airtight containers for a few days, making them perfect for boxes or jars for holiday gatherings or birthday parties! Unlike frosted cakes or cream desserts, cold cookies are heat-resistant, transportable, and storage-resistant, making them a great choice for summer adventures or packed lunches.
Aren’t they a delicious summer cookie?
Of course. It’s perfect for summer baking. Here’s why:
1. It's not necessary to bake everything at once.
You can make a large ball of dough and put it in the fridge or freezer, then cut and bake a few at a time. By making a large ball of dough at once, you don't have to mix it the next time! Baking in small batches is also a smart way to avoid using a hot oven every day.
2. They're part of the light-baking trend.
These cookies have a crisp, light texture, a far cry from thick, buttery bombs. When cooled, they become fresh, dry, and crispy, perfect with ice cream or even on their own.
3. They keep your kitchen cooler.
Less prep work, less baking time, and classic flavor without the frills: a minimalist baker's summer dream.
Final Thoughts
Traditional refrigerator cookies are many things: tradition and practicality, flavor and versatility, simplicity and elegance. Whether you're baking for Christmas, a picnic or just want an easy treat, these cookies should be your first choice. They prove that sometimes the simplest recipes can become etched in our memories.
So roll up your sleeves, whip up a quick batch, refrigerate them, and see why frozen cookies still taste so good!